Preamble
"The purpose of the Old Reel Collector's Association, Inc. is education through the collection and distribution of historical and technical data regarding fishing reels, their development and their inventors and manufacturers from the earliest times through the present day. In order to enhance the knowledge of these subjects, the collection and preservation of examples of post production reels is to be encouraged for the benefit of present and future generations…"
ORCA Constitution §III.1
Obviously, images are a huge part of this, whether it be a reel photo or document scan. We aim - with your help - to collect, preserve and distribute this data, using only ORCA's Reel Talk message board. To assist in this, we have tried to make this process as easy as possible for all.
Quick Start
Designed from the ground up to be as simple as 1,2,3. Most likely, you will need no instruction.
- Add your images.
- Upload your images.
- Insert your images in your post.
- Multiple image files are accepted up to a generous 3MB individual limit.
- Three versions are saved, allowing for: 150px max side thumbnails, 800px by 600px max postable and the original, which is viewable via the clicked image.
- The image must reside on your device initially; direct upload from another site is disallowed.
- Try to keep file names short. You may get a warning or your photo may not upload if they are too long.
- This will work differently depending on: your device, your Operating System and your browser.
- Images can be added one at a time or as a set, either by selection or drag and drop onto the page.
- Previews are shown, allowing you to make adjustments to your selection before you upload.
- Your choice to either upload one or all.
- Your choice to add thumbnails or regular sized images to your post.
- For most, tapping or clicking the appropriate choice of size will automaticaly insert the appropriate code in your message at the point where your cursor is placed. Others may have to copy the code into their post, using the method they are used to.
- Warning: Make sure all your images have been inserted into your message before preview, as the original codes will no longer be available. (You are still free to reupload and insert.)
- Warning: Please do not attempt to hotlink to ORCA hosted images from any other site as you will find that such attempts are replaced by an embarassing graphic. (You are still free to link others to your post on ORCA's site.)
- Warning: Images cannot be: renamed, moved or deleted; please think ahead. (Of course, you can still edit your posts within the edit period, should you so need.)
- If a Member posts multiple images in a topic, these images are connected, when viewed as either a gallery or slideshow.
- If you either do not like it or cannot use it with your device, OS, browser combination, you can still use previous methods.
- You use of this service is solely for images that you either own or properly obtained from the appropriate owner with full permissions to post it on the Site. Any substantiated claims of copyright infringement, will be dealt with expeditiously by removing or disabling access to the material that is claimed to be infringing.
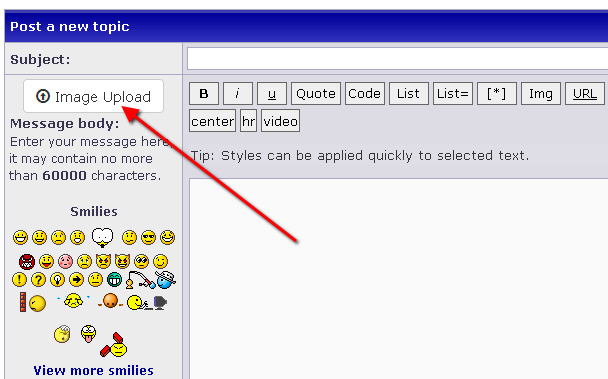
Click the button above the smilies towards the left of the post editor:
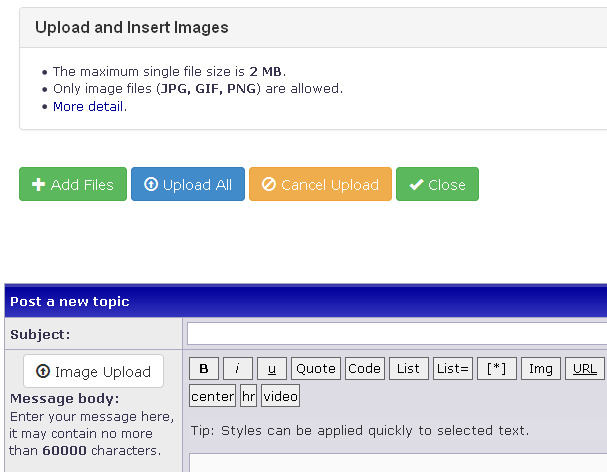
and the tool will open:
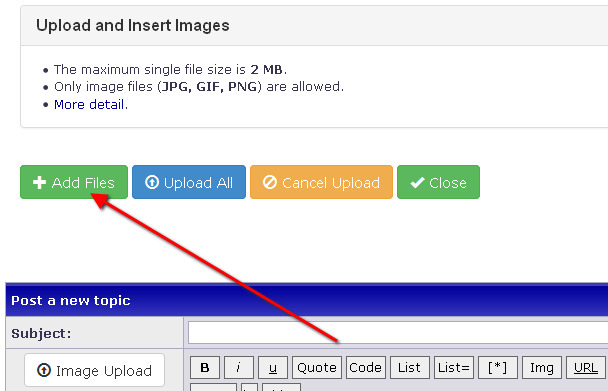
Step 2
Press the "Add Files" button:
select your files and press "Open" (or whatever your Operating System shows in its place):
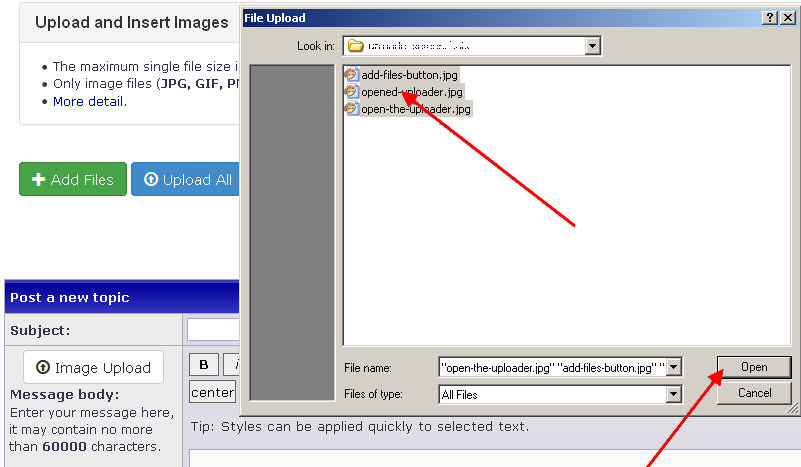
Usual shortcuts for your Operating System apply. e.g. Ctrl+Click or Command+Click, selects multiple random files and Shift+Click selects a series of files.
If you are able to open two windows side by side, you can drag:
and then drop the image/s anywhere on the page to add them.

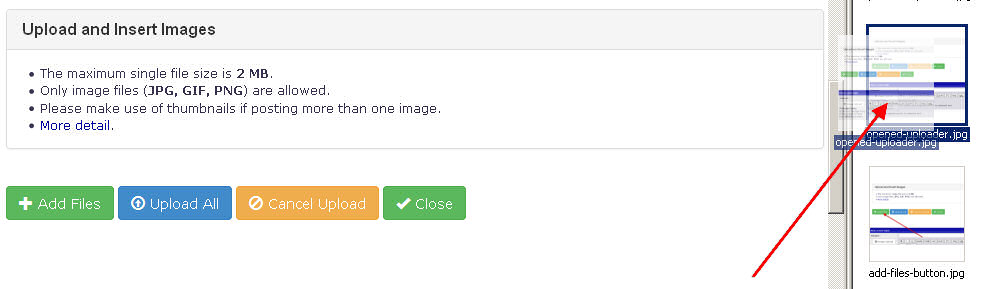
You will then end up with a screen looking like this:
If you make an error with your selection, you can remove these before you actually upload, either by using the "Cancel" button/s on the right, for individual images or the "Cancel Upload" button to remove all. You can then start again, if you wish.

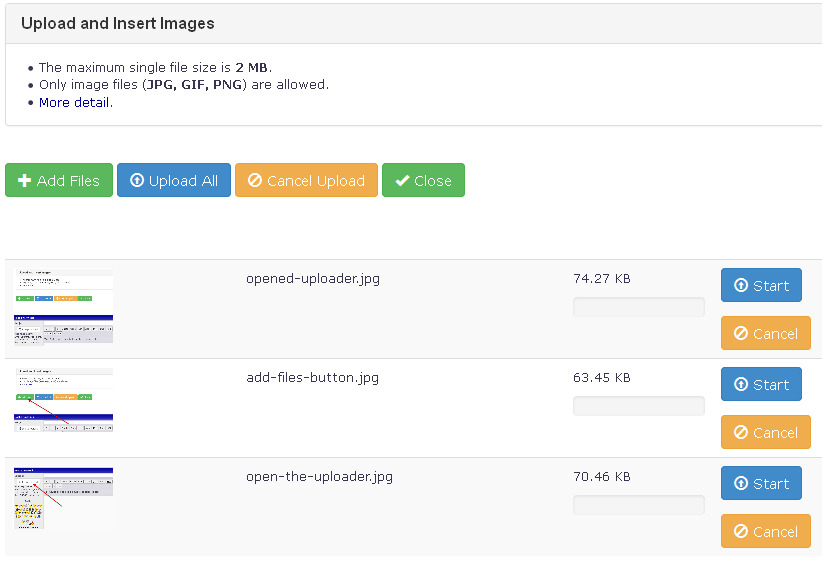
You can upload them all at the same time by pressing the "Upload All" button or you may choose to upload one at a time, using the "Start" button/s to the right of the file/s:

Once that is complete, the screen will change to look like this:

Step 3
If you need to, you may preview your uploaded images by either clicking on the thumbnail or the link, as shown by the red arrows above, and now you are ready to insert the codes into your message.
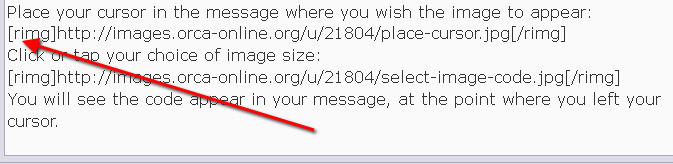
Place your cursor in the message where you wish the image to appear:

Click or tap your choice of image size:
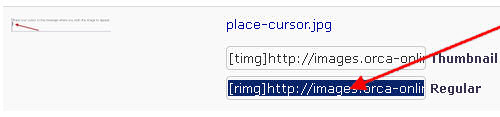
You will see the code appear in your message, at the point where you left your cursor.
When you have all your images inserted into your post, you may then use the "Preview" button to check your post before you "Submit". This will allow you to correct any errors or alignment before everyone gets to see your post.
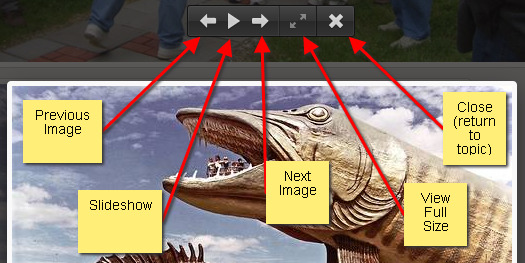
Viewing Posted Images
Clicking on an image in a post will take you to the original image viewed in a thickbox. If a Member has posted more than one image, these images can be viewed either as a gallery or a slideshow by using the buttons above the image.